> Content > 3D Paracas Skull
3D Paracas Skull
Skull deformations

Paracas was an important civilization of ancient Peru that developed by the Paracas Peninsula (region of Ica, Peru). It dates back to 700-200 BC and prior to the Nazca civilization, of which is considered to be a precursor by some anthropologists.
One of the most striking features of the Paracas civilization is the practice of cranial deformation .
The archaeologist J. C. Tello , who supervised the archaeological excavations regarding this civilization unearthed lots of artificially deformed skulls; anthropologists think that these deformations were practiced on children by applying two wood panels and tying them together so as to adversely affect the growth of bones as long as they were welded permanently.
Most likely the deformations were carried out in order to distinguish individuals belonging to a high caste, or for religious reasons, or because it was believed that a deformed head would increase the intellectual, physical or paranormal activities.
This custom is not to be considered surprising, as cranial deformations (as well as skull drilling) were practiced since ancient times by other populations distributed in all continents, with particular concentration in the Americas.
- In this page
- Skull deformations
- 3D reconstruction
- 3D model
- Download .ply
- Conclusions
- FAQ
- Share
-


The idea of a 3D reconstruction
Some time ago I came across the Arc-Team Open Research site, which is concerned with forensic facial reconstruction of primitive men, mummies and extinct animals, using "open source" tools; in particular they use for their projects Blender, which is a program for modeling, animation and three-dimensional rendering.
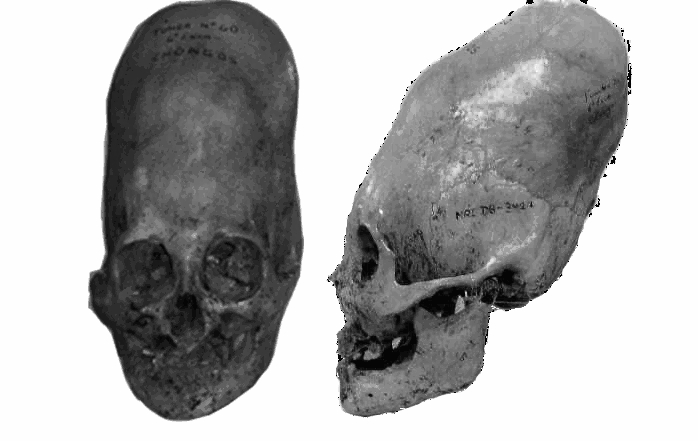
So I wanted to try to make something similar starting from some photographs of the deformed skull number 176 (found in Tomb 60 of the 6th archaeological excavation, "Chongos") exposed in the Regional Museum of Ica (Peru)
I chose this skull (compared to others), because was the most documented online and there were both font and side pictures (actually the front photos I found on the net is not very satisfactory, because it has a slight perspective). Unfortunately, when I visited the Museum of Ica, some time ago, I did not imagine that a day I will be so involved with the Skull-176, and I took only one picture of it (it is shown above). If anyone had the opportunity to visit the Museum and take two shots (one orthogonal lateral and one orthogonal front) of the skull-176 and send me them, I could redo the entire work with greater accuracy.
- Back to the top
- In this page
- Skull deformations
- 3D reconstruction
- 3D model
- Download .ply
- Conclusions
- FAQ
- Share
-
3D Model
Step 1: from 2D to 3D skull
NOTE: The whole process of facial reconstruction is based on the tutorial by Cicero Moraes concerning the forensic reconstruction of a Neanderthal manThe technique consists of building a three-dimensional model skull from two 2D photos, one front and one side. This technique is clearly described in a detailed series of video tutorials published by Jason Welsh. For those who want to try, it should be noted that a basic knowledge of Blender is required.
The procedure is as follows:
I chose two photographs of the Skull-176, one front and one side. As explained previously, the quality is poor and would be better to shoot some more detailed photographs.
Since the two images have not the same resolution, I adapted their proportions with The Gimp in order to obtain two images compatible with each other.
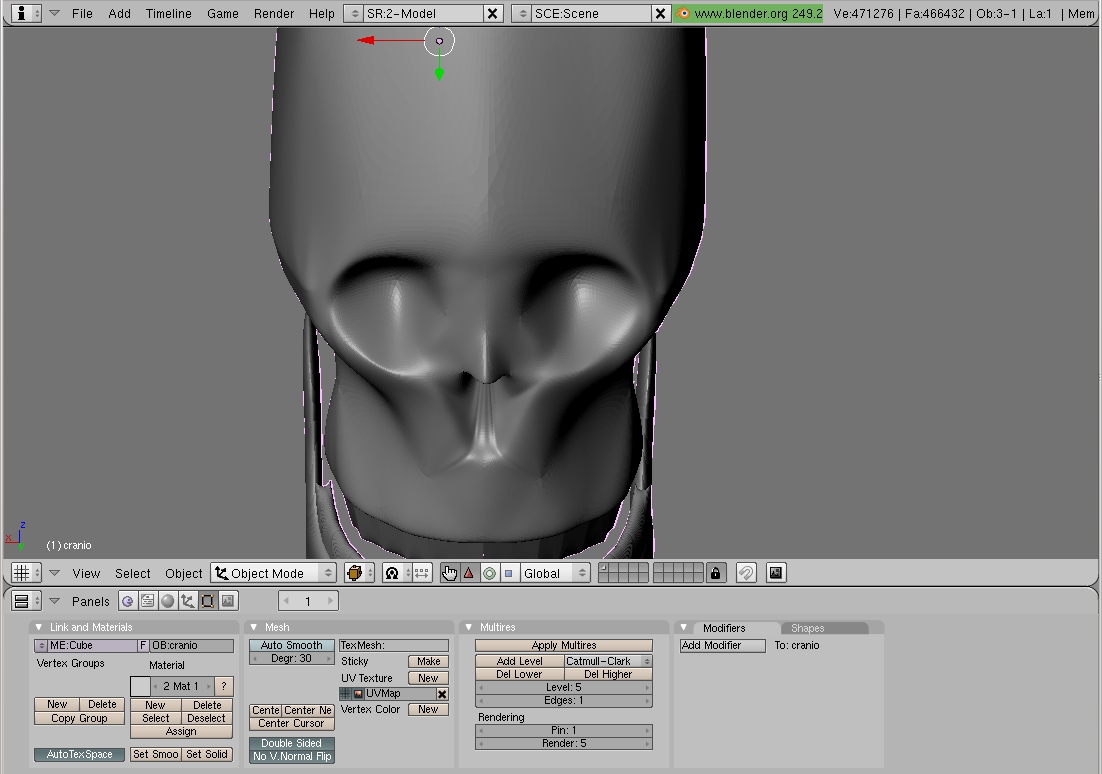
Then, following the tutorial mentioned above, I created the skull in three dimensions, using the photos as a base (i.e. as backgrounds of the front and side orthogonal views) above which I modeled a cubic mesh and grossly distort it until it took the form of a skull, gradually approaching the edges.
Finally with the "multiresolution" tool of blender I increased the definition of the mesh obtaining the result shown in the following video.
3D rendering of the Paracas Skull-176 with Blender
Step 2: skin depth markers
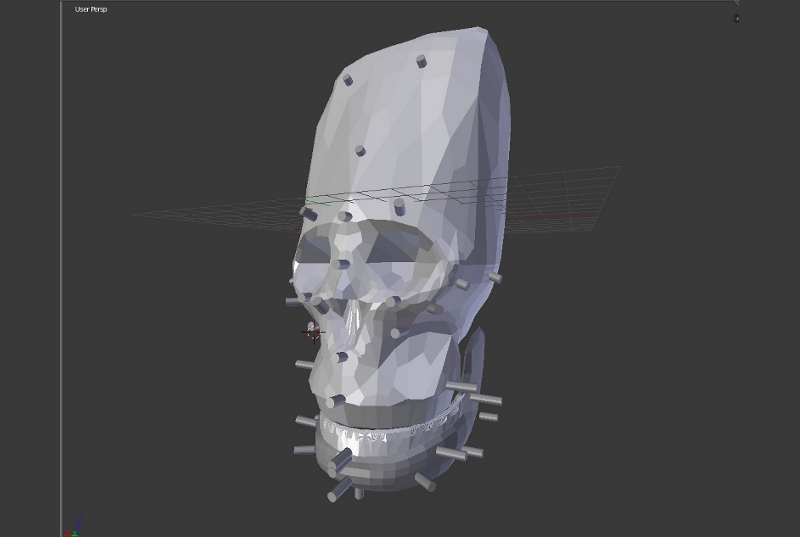 The second step in the facial reconstruction is to set the
thickness of the skin in some strategic points of the skull.
The second step in the facial reconstruction is to set the
thickness of the skin in some strategic points of the skull.
So I searched for a few bibliographical article about this
subject and I found a very good site of forensic artists:
the tables of the skin thickness from
Dr. Stephan & Simpson (2012)"
The markers were made by creating cylindrical meshes and resizing their radius. Obviously the proportions between the various markers were maintained. The result is shown in the image above.
Step 3: Eyes and muscles
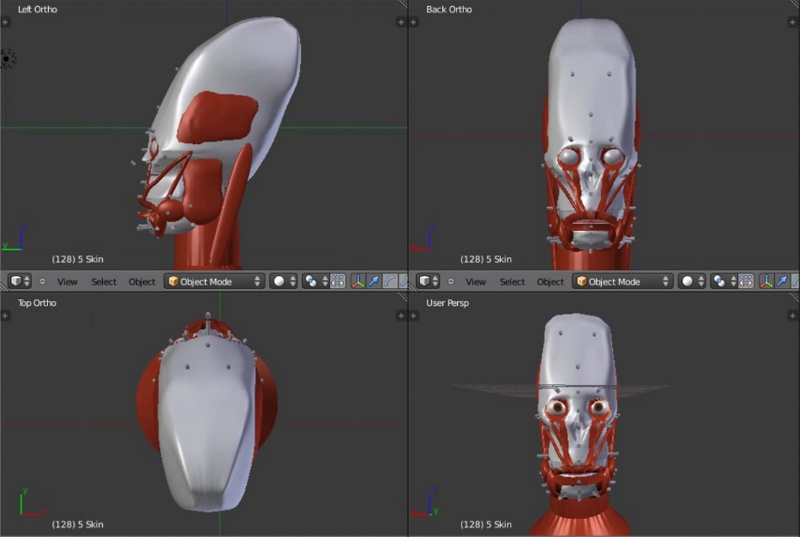
I made the eyes by creating a spherical mesh on which I mapped a picture of a pupil. The eyes should be created before the muscles as they serve as a reference points for the ends of the mouth.
The reconstruction of the muscles implies a knowledge of the anatomy of the skull that I did not have, and even a little 'artistic inspiration' of which I am lacking, so it is the hardest step that I have faced and that gave the worst results.
Step 4: dermis and epidermis
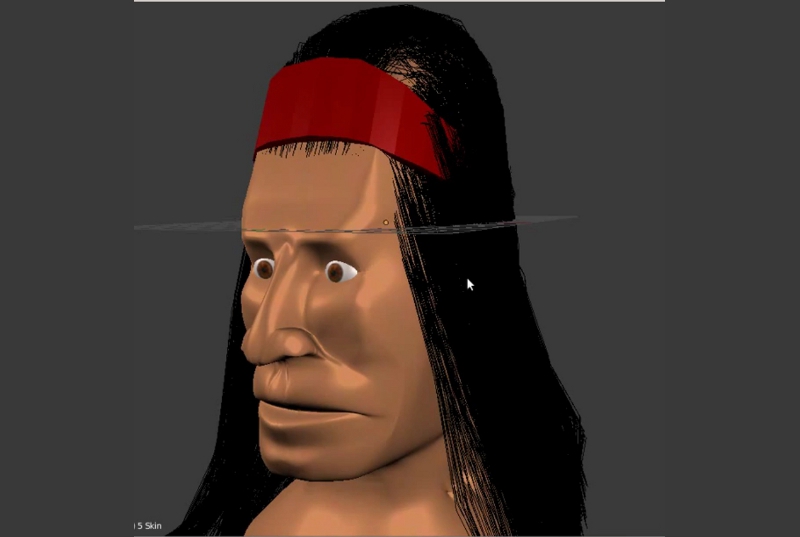
The last step is the addition of the dermis and epidermis to the model. The texturing of the skin is not a simple thing and goes well beyond my current skills in the use of Blender. I was able to give an almost believable pigment to the skin of the subject, yet far away from reality.
As regards the hair, the job is greatly simplified by the Blender's particle mode. I also added a sort of bandana (cylindrical mesh) taking as inspiration the photo of a mummy of the Paracas culture.
The result is beyond my expectations, but my opinion is biased. See the picture on the side... and the following video:
Three dimensional rendering of the face with Blender
- Back to the top
- In this page
- Skull deformations
- 3D reconstruction
- 3D model
- Download .ply
- Conclusions
- FAQ
- Share
-
Download .ply
Please, download the file of the skull 176 in .ply format.
It is necessary to unzip the file and install a Polygon File Format (ply) viewer; one of this viewer is Blender
- Back to the top
- In this page
- Skull deformations
- 3D reconstruction
- 3D model
- Download .ply
- Conclusions
- FAQ
- Share
-
Conclusions
Objectively, the process of forensic reconstruction is by no means trivial and requires much more time than I have devoted, to obtain good results.
Regardless of the quality of the photographs of the skull from which I began, the model presented some problems since the beginning, such as an exaggerated jaw. This is probably due to a parallax effect caused by the lack of orthogonality of the frontal photograph or by an error in the positioning of the jaw with respect to the skull (?). I made some revisions to the chin and jaw in order to make them thinner and to appear more in harmony with the rest of the skull.
I do not like the "cartoon effect" on the final rendering; I'll have to deepen the texturing of human skin with blender.
I suppose that in the eyes of an expert the result may seem ridiculous, but I'm pleased to be able to reach a quite credible conclusion, I honestly did not expect.
The experience with Blender was positive: it is a versatile and, under some aspects, easy to use (see for example the rendering of the hair). The complexity of the functions in the program still requires a greater commitment, to acquire a complete mastery of the program.
- Back to the top
- In this page
- Skull deformations
- 3D reconstruction
- 3D model
- Download .ply
- Conclusions
- FAQ
- Share
-
FAQ
Waiting for questions...
- Back to the top
- In this page
- Skull deformations
- 3D reconstruction
- 3D model
- Download .ply
- Conclusions
- FAQ
- Share
-